Laser Scanning
Authors: Maciej Jaśkiewicz, Jacek Walczak, Maciej Głowiak
Version 1.1, August 2020
Abstract
This document describes how to acquire 3D data with laser scanners into point clouds and briefly presents the available formats and software. In addition, it describes the possibilities of editing and post-production of point clouds for high-resolution video production in various formats: 8K, 16K, 3D, 360 along with a discussion of projection types such as ERP (Equirectangular Projection) or CMP (CubeMap Projection). It also discusses the preparation and encoding of the final image using software produced by the Immersify project. The document contains practical experience gained during the scanning of the cathedral in Poznan.
Introduction
Due to technological constraints, the acquisition of high-definition video is currently limited. While 4K technology is becoming more and more popular in both professional (cinema) and home (television, mobile phones) applications, still there are only a fewprototype solutions for obtaining 8K content. 360° cameras are also limited to 8K, but this resolution applies to full spherical representation, which means that the effectively watched resolution on HMD is much lower.
In order to generate photorealistic video content with a higher resolution, in practice we have 2 options:
- use methods of designing and rendering 3D objects (CGI – Computer Generated Imagery)
- acquire content with the use of 3D scanners (point cloud)
The purpose of this document is to describe best practices of the second approach, with acquisition, editing, processing, animating and rendering.
Acquisition
The first step towards the production of photorealistic images based on the point clouds rendering is to record raw data acquired by the laser scanner or LIDAR (Light Detection and Ranging). In the first step, the laser scanner calibrates itself and receives metadata about its location (e.g. GPS data). When the position of the scanner is precisely defined, it starts sending out a laser beam and then examines the light reflected from the objects on the path of light. The diffuse luminous intensity value is converted into the corresponding coordinates of the points in space and saved in the defined format of the point clouds datasets. Finally, the scanner measures the exposure and takes pictures to obtain information about the point colours. In this guideline, we explain how we use FARO Focus 3D X330 laser scanner for all of our scans.
The most important thing before starting a scan is to plan the scanner’s positions in the scanned object. We put together a list of aspects to consider while scanning:
- Planning: All organizational aspects of the scanning should be well planned in advance. There are many issues that should be taken into consideration before you start, like timing, people and moving objects, light conditions, scanner placing points etc.
- Scanner calibration: Do not move the scanner after it get GPS data and metadata. It will affect scans, lowering precision or making scans unusable.
- Number of scans: Take more than one scan at given position, if there are moving objects (e.g. people and animals).
- Open spaces: In big, open spaces without any distinctive signs, use markers to make the stitching possible.
- Control exposition: Try to avoid variable lighting conditions during the scanning process, always make sure that all scans have similar light conditions.
- Avoiding reflecting surfaces: Cover the windows and all the reflecting surfaces, like mirrors or metal elements. To make reflecting objects non-reflecting use cyclodecane spray, which won’t hurt the surface.
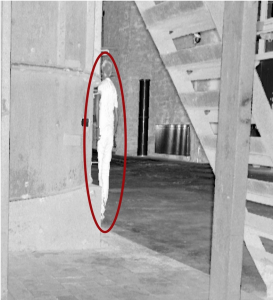
- Avoiding moving objects during scan: People walking around or other objects in move will cause shadows and scanning errors that are difficult to find and remove, especially in scans with large amounts of data.
Editing
The second step is to combine individual scans into a single point cloud. This process, called stitching, is a main part of post-production editing process. The other is removing ghosting of scanned objects in move (such as people walking around).
Stitching is a key process affecting the quality of created point clouds and it depends on the proper placement of scans inside the cloud and the correct matching of overlapping fragments of scans. In order to process the stitching in a proper way, it is required to record individual scans with appropriate (approximately 20%) set of overlapping points and surfaces. Scans without common set of points cannot be stitched. Using any stitching software, all individual scans should be imported into one point cloud.
An important part of point cloud processing is the procedure of removing unwanted objects and fixing any other glitches. Most common glitches in scans are caused by moving objects (people, animals), reflections or unwanted far objects. Most commercially available stitching software offer tools for semi-automatic or manual removing and cleaning the final point cloud.
Rendering
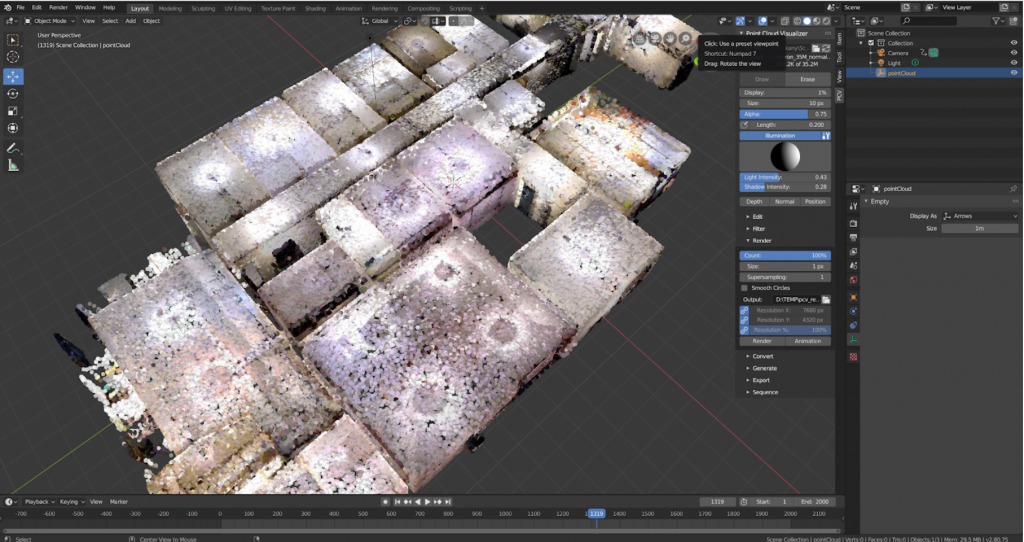
To generate a high-resolution video from the scanned and processed data, a rendering process must be performed. Due to high density of input points, it is possible to generate video materials in ultra-high resolution with very good quality, e.g. 16K or even more, without losing details and sharpness of the image. There are several applications on the market that enable photo-realistic renderings based on point clouds. In our workflow we used two of them to render 8K, 16K, 360° and 3D content: CloudCompare for rendering Cathedral church and Blender for further projects.
Post-production and Encoding
After the rendering phase, a ready set of single graphic files containing successive frames of the prepared animation is obtained. In order to prepare appropriate materials for different types of content (2D, 3D, 360°) and displays (HMD, CAVEs), post-production process should be conducted, including appropriate preparation of graphic formats, colour correction and the final encoding process allowing for the display of materials with the use of standard video players. Real-time rendering and displaying point cloud animation at high resolution and bitrate is still a challenge even for modern high-spec workstations. So, the best way of optimization is to encode the content and generate standard video file.
For more details on the points mentioned in this summary, please have a look at the guideline.